Tutorial: How to connect your social media accounts on ComInTime to publish automatically?
The mobile version of ComInTime is (finally) here! Now available on the App Store and Play Store, it allows you to manage your communication from anywhere: your living room, between meetings, or on the go.
But before you can start publishing content directly from the mobile app, there's one essential step: linking your social media accounts to your ComInTime account.
👉 Please note: This setup must currently be done through the online version.
In this tutorial, we’ll guide you step by step through the process of connecting your LinkedIn, Facebook, or Instagram pages, so everything is ready when you launch your mobile app!
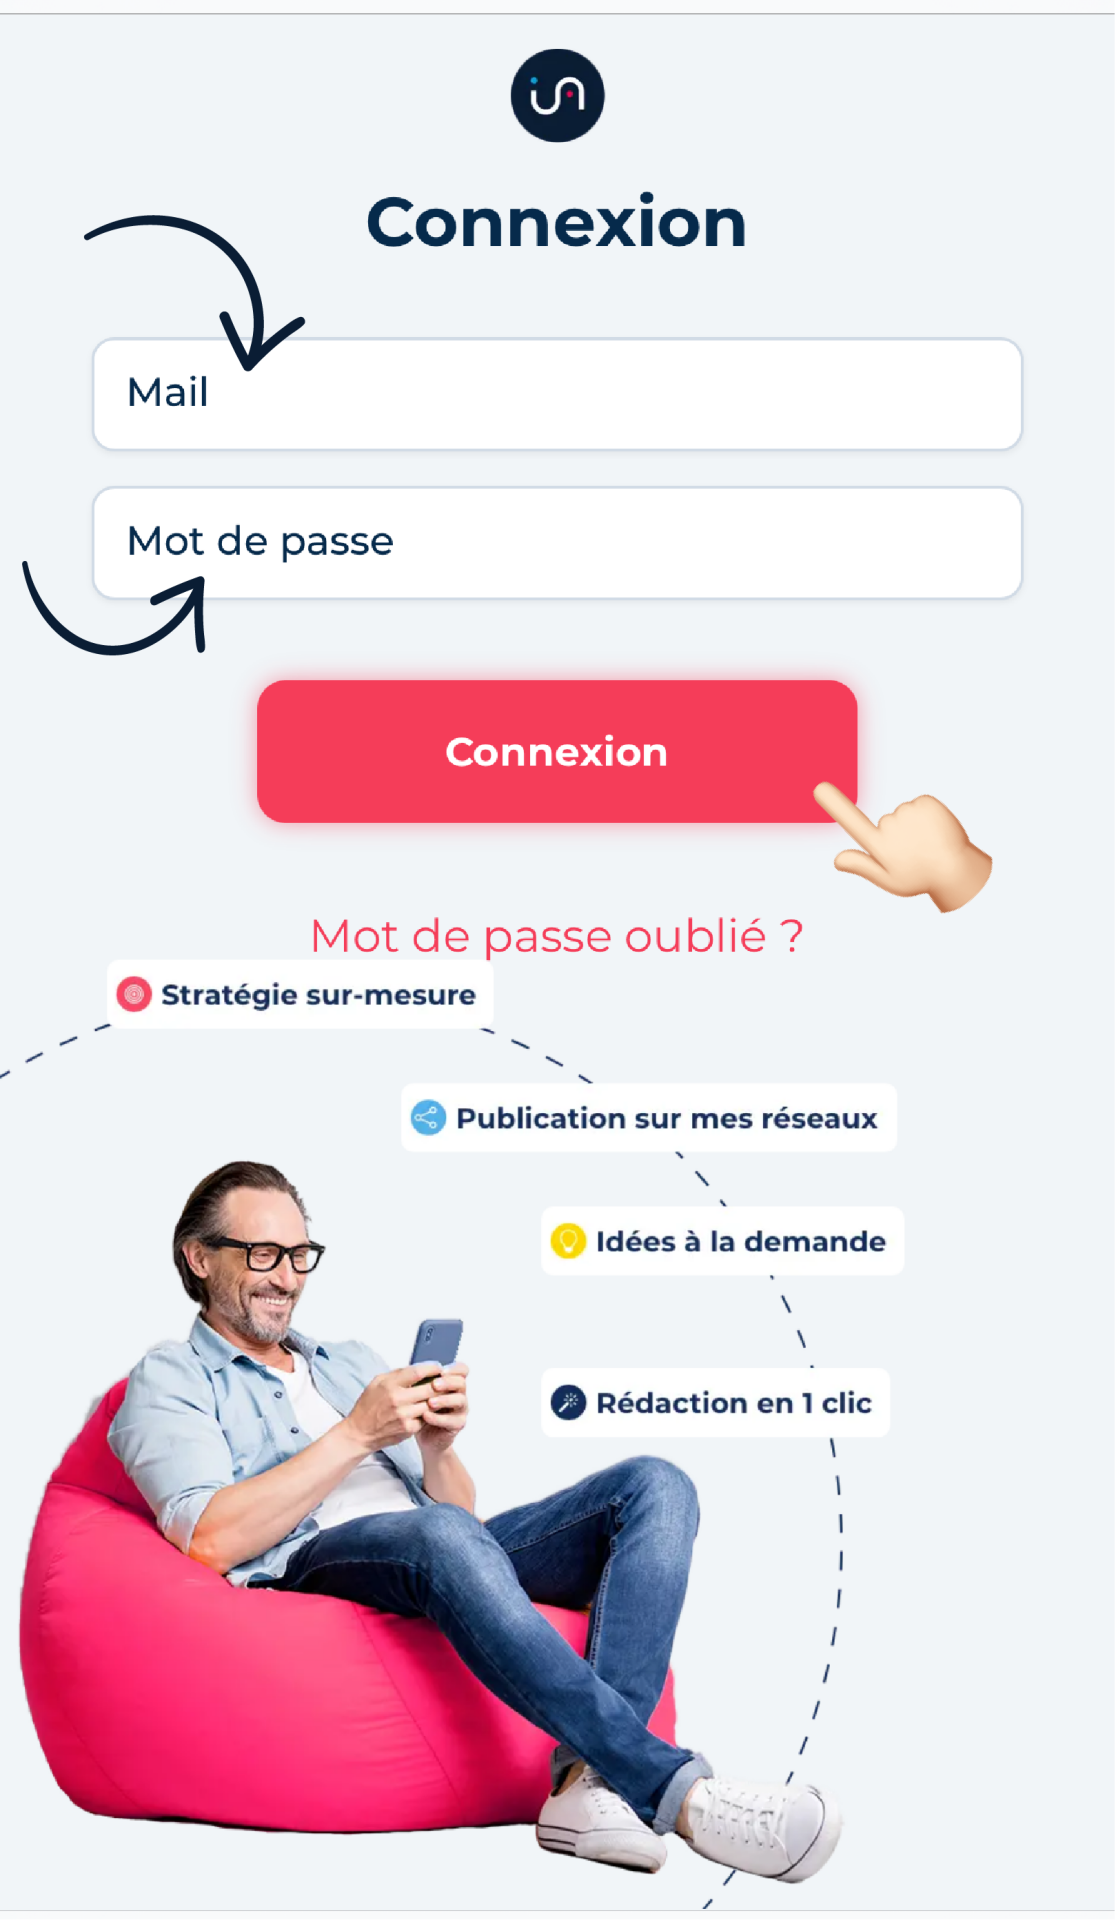
Step 1️⃣: Log in to your ComInTime account
📱 On mobile:
Start by going to (mobile app link) and logging in with your usual credentials. If you manage multiple pages, select the workspace you want to use. If you only have one, you’ll be automatically directed to it.
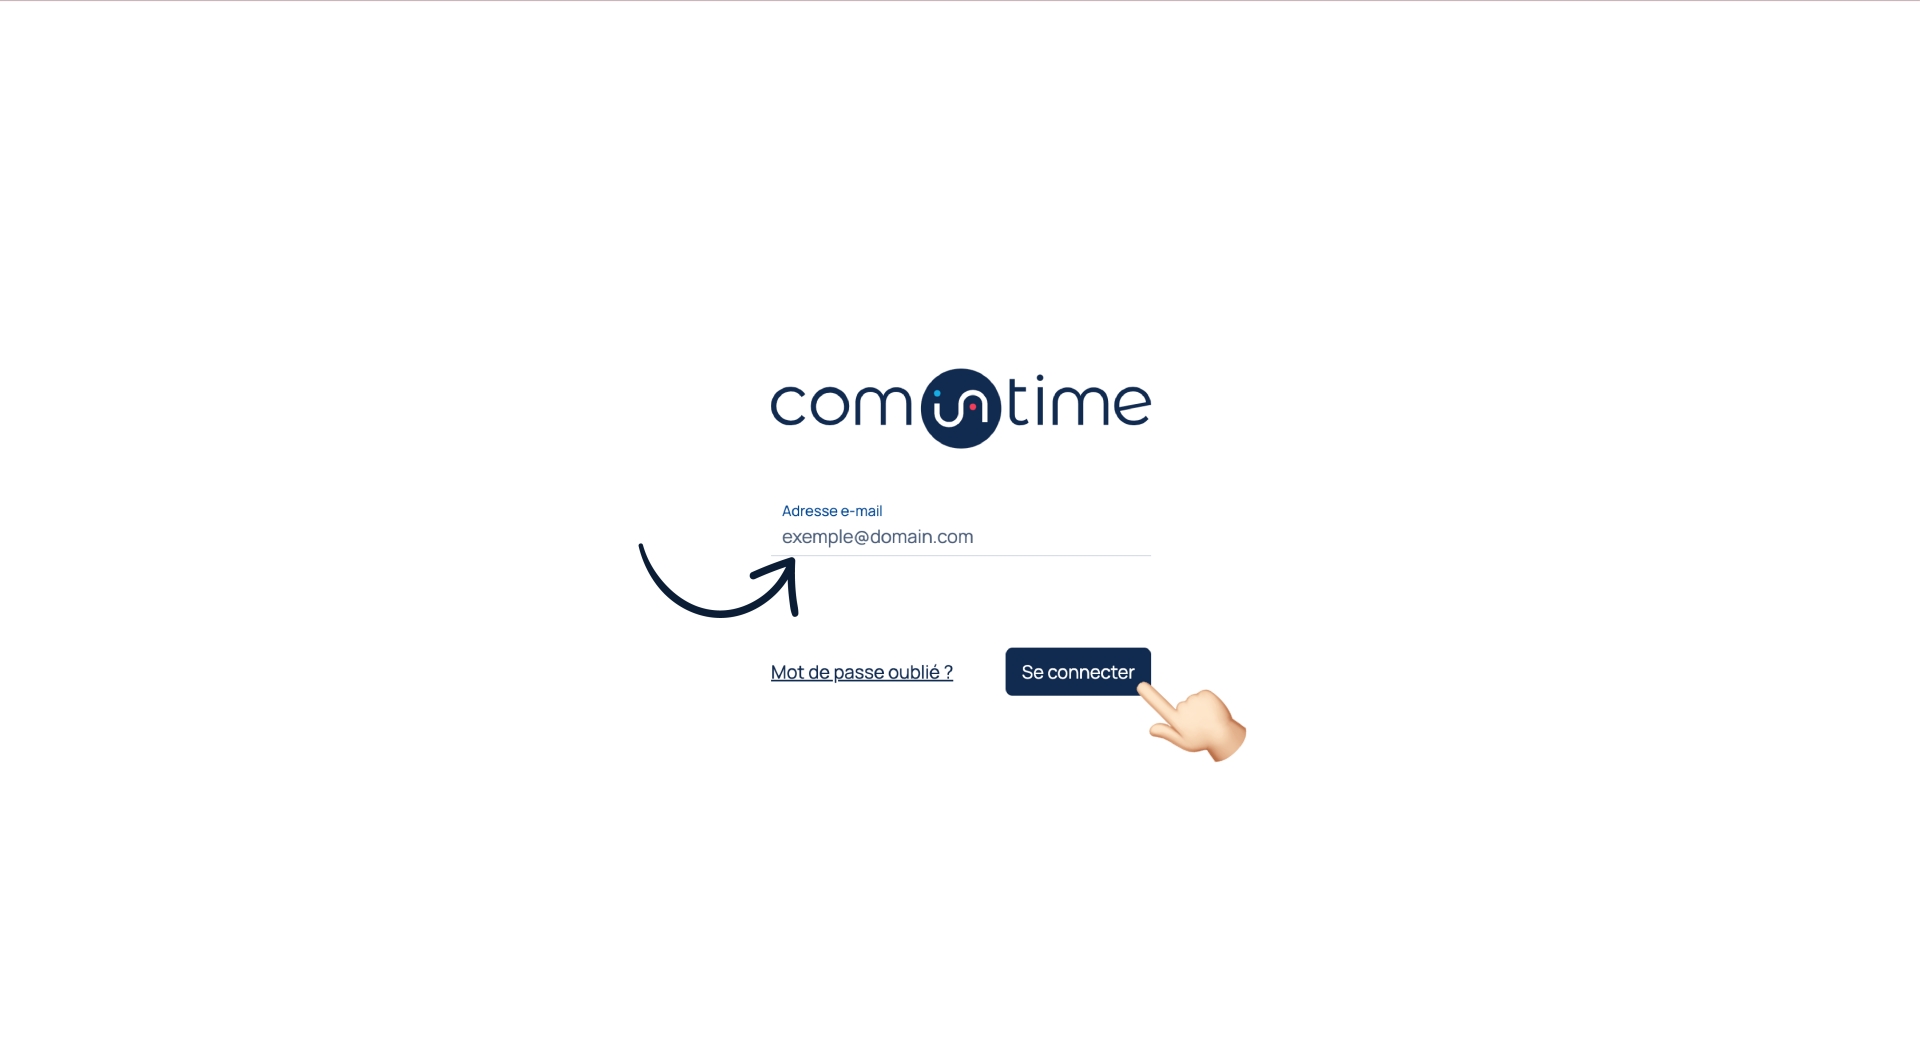
💻 On desktop:
Go to (desktop app link) and log in with your usual credentials. If you're an admin of multiple pages, select the folder you want to work in from the dropdown menu. If you only have one, you’ll be automatically directed to it.
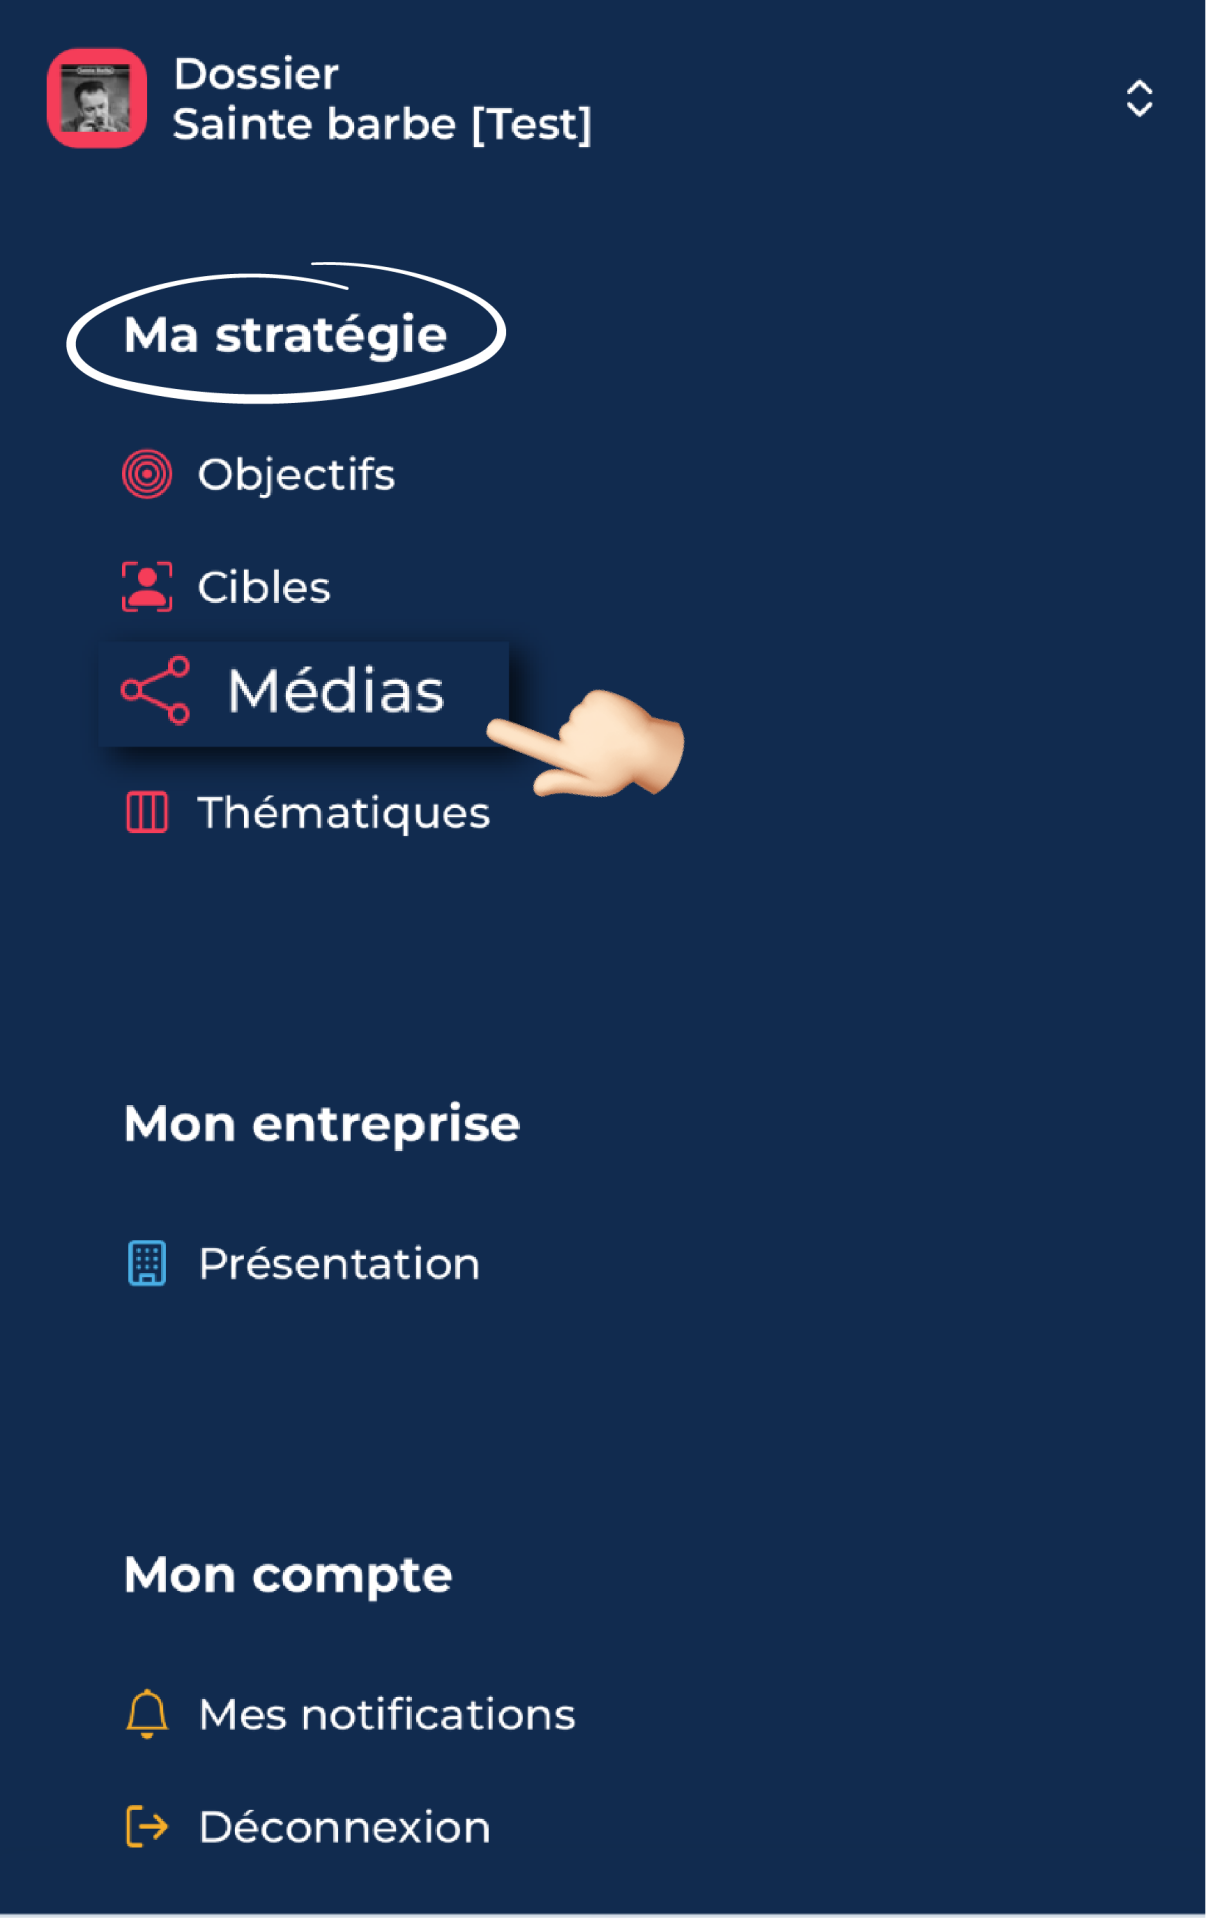
Step 2️⃣: Access the “Media” section within your strategy interface
📱 On mobile:
Once logged in, you’ll land on the content tracking interface. Tap the three dots on the bottom-right corner of your screen to open the “burger menu” – a dropdown list of the app's interfaces. In the “My Strategy” section, go to the “Media” tab. This is where you centralize key communication information, including the channels you plan to use.
💻 On desktop:
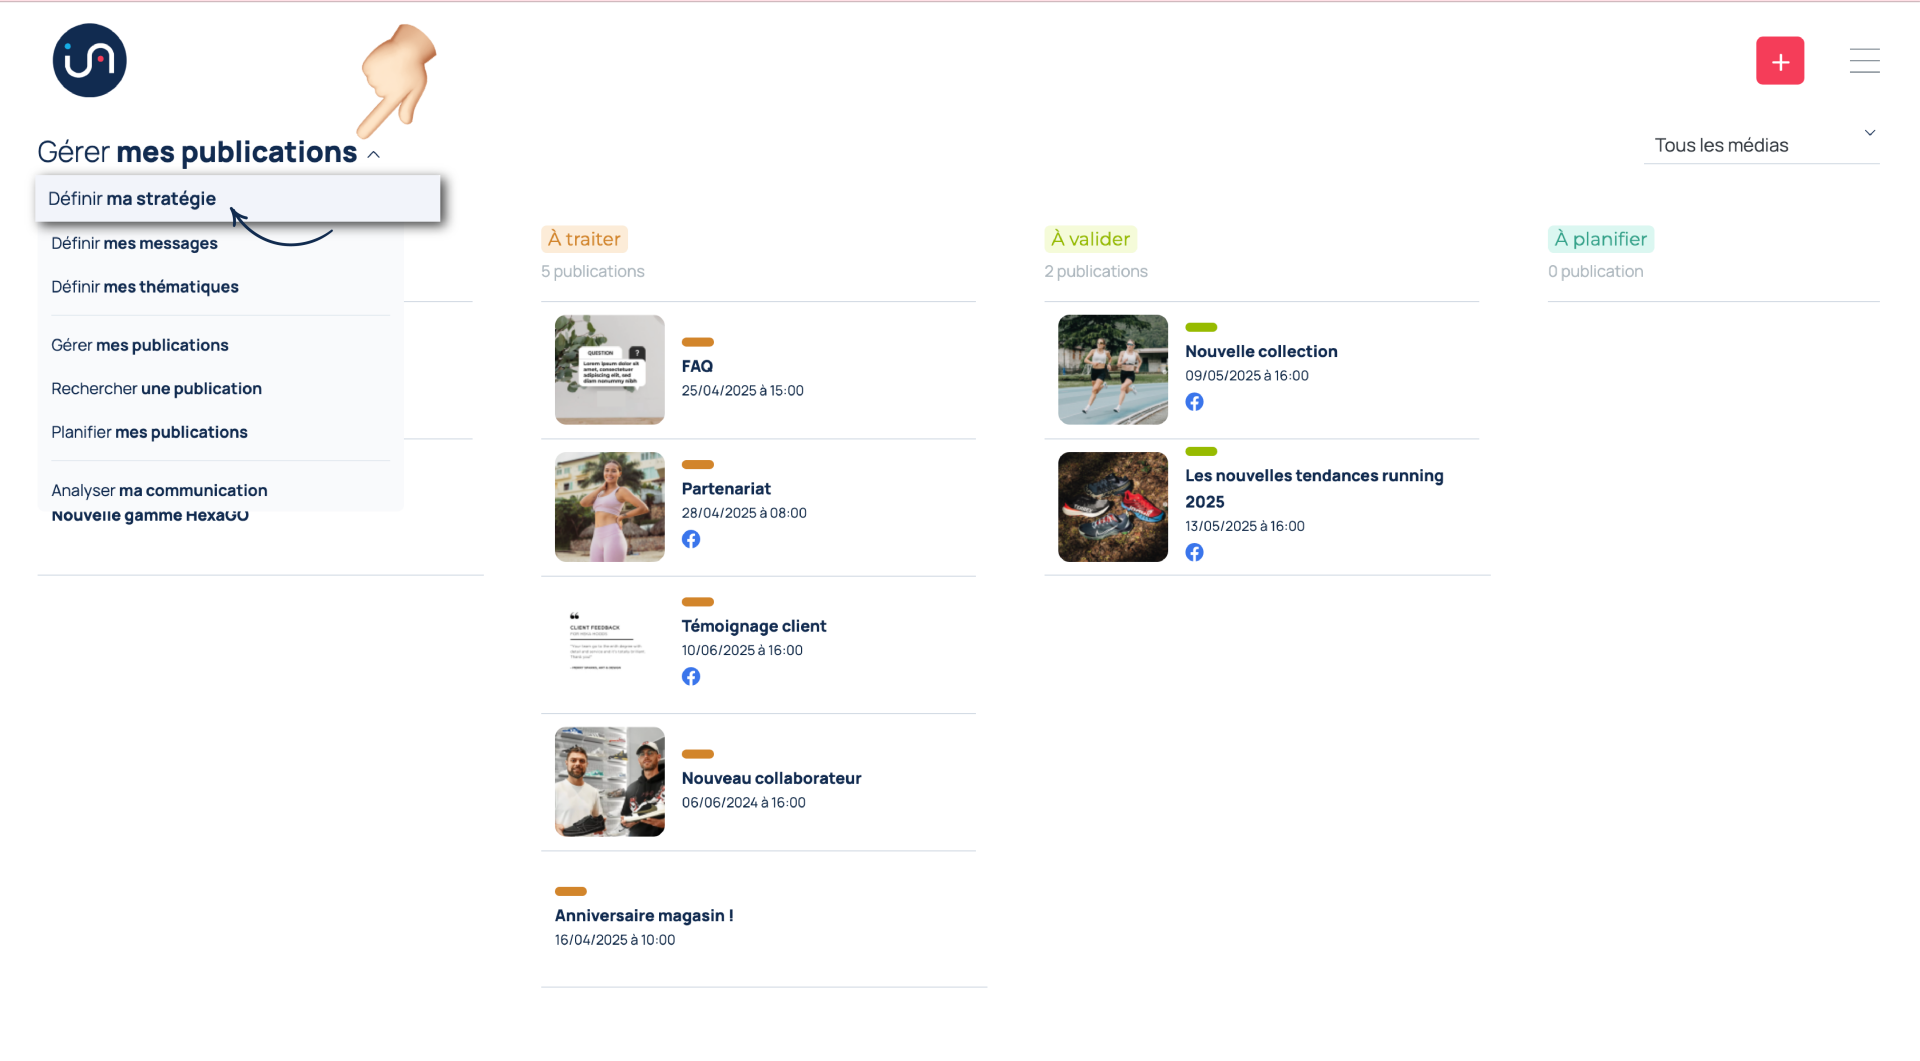
After logging in, you’ll also land on the content tracking interface. Click on “Manage My Posts” and a dropdown menu will appear. Select the first tab, “Define My Strategy,” to access the central hub for all key strategy information.
Step 3️⃣: Choose your communication channels
📱 On mobile:
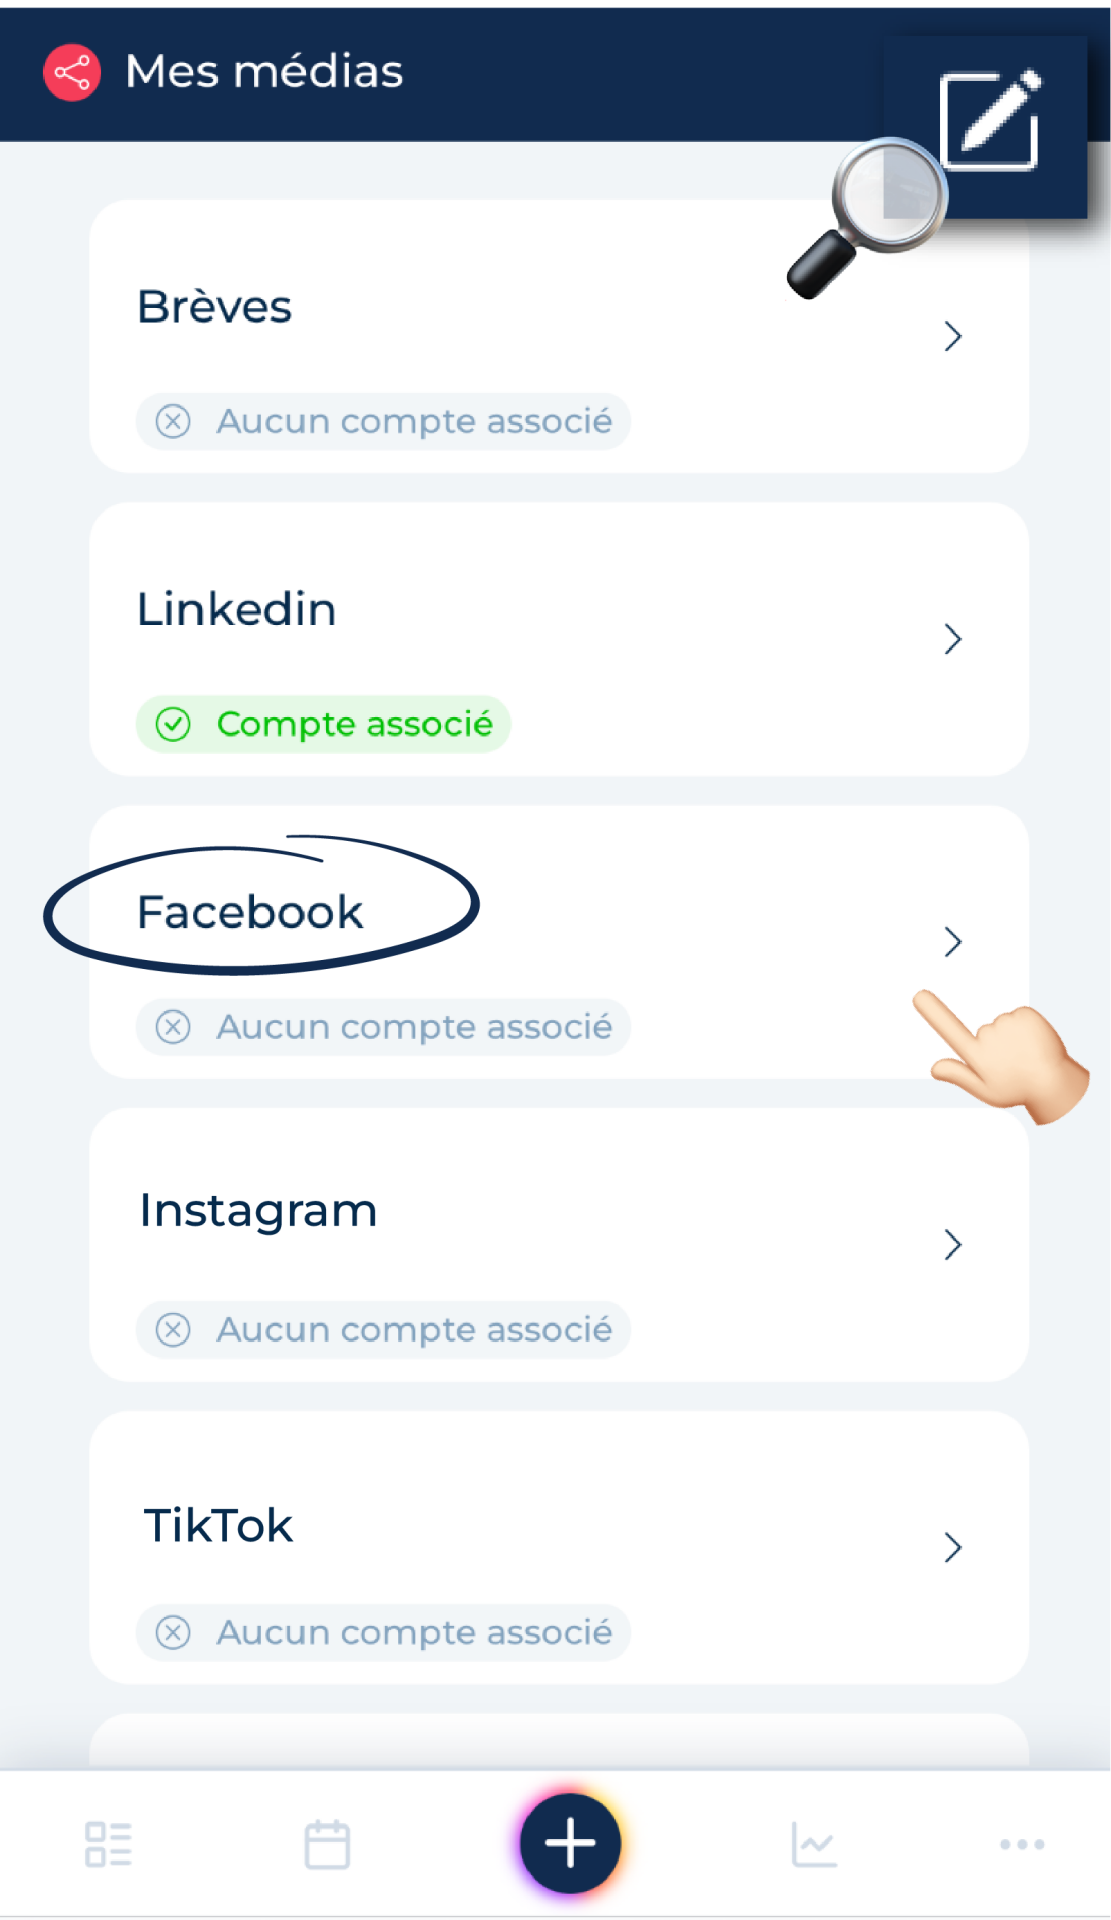
In this section, you can enter the media you use for communication (social media, blog, newsletter, updates, etc.) by tapping the pencil icon in the top-right corner. Once you've listed your communication channels and want to link, for example, your Facebook page to the Facebook channel you've created, simply tap the relevant box.
💻 On desktop:
Here, you'll find your strategic elements such as goals, target audiences, and media channels. To enter your media, click the grey text “Add a new item” at the bottom of the corresponding column. Once you've listed all your channels and want to link, for instance, your Facebook page to the Facebook channel, hover over the relevant box and click the pencil icon on the right.

Step 4️⃣: Configure your editorial line and access social media settings
📱 On mobile:
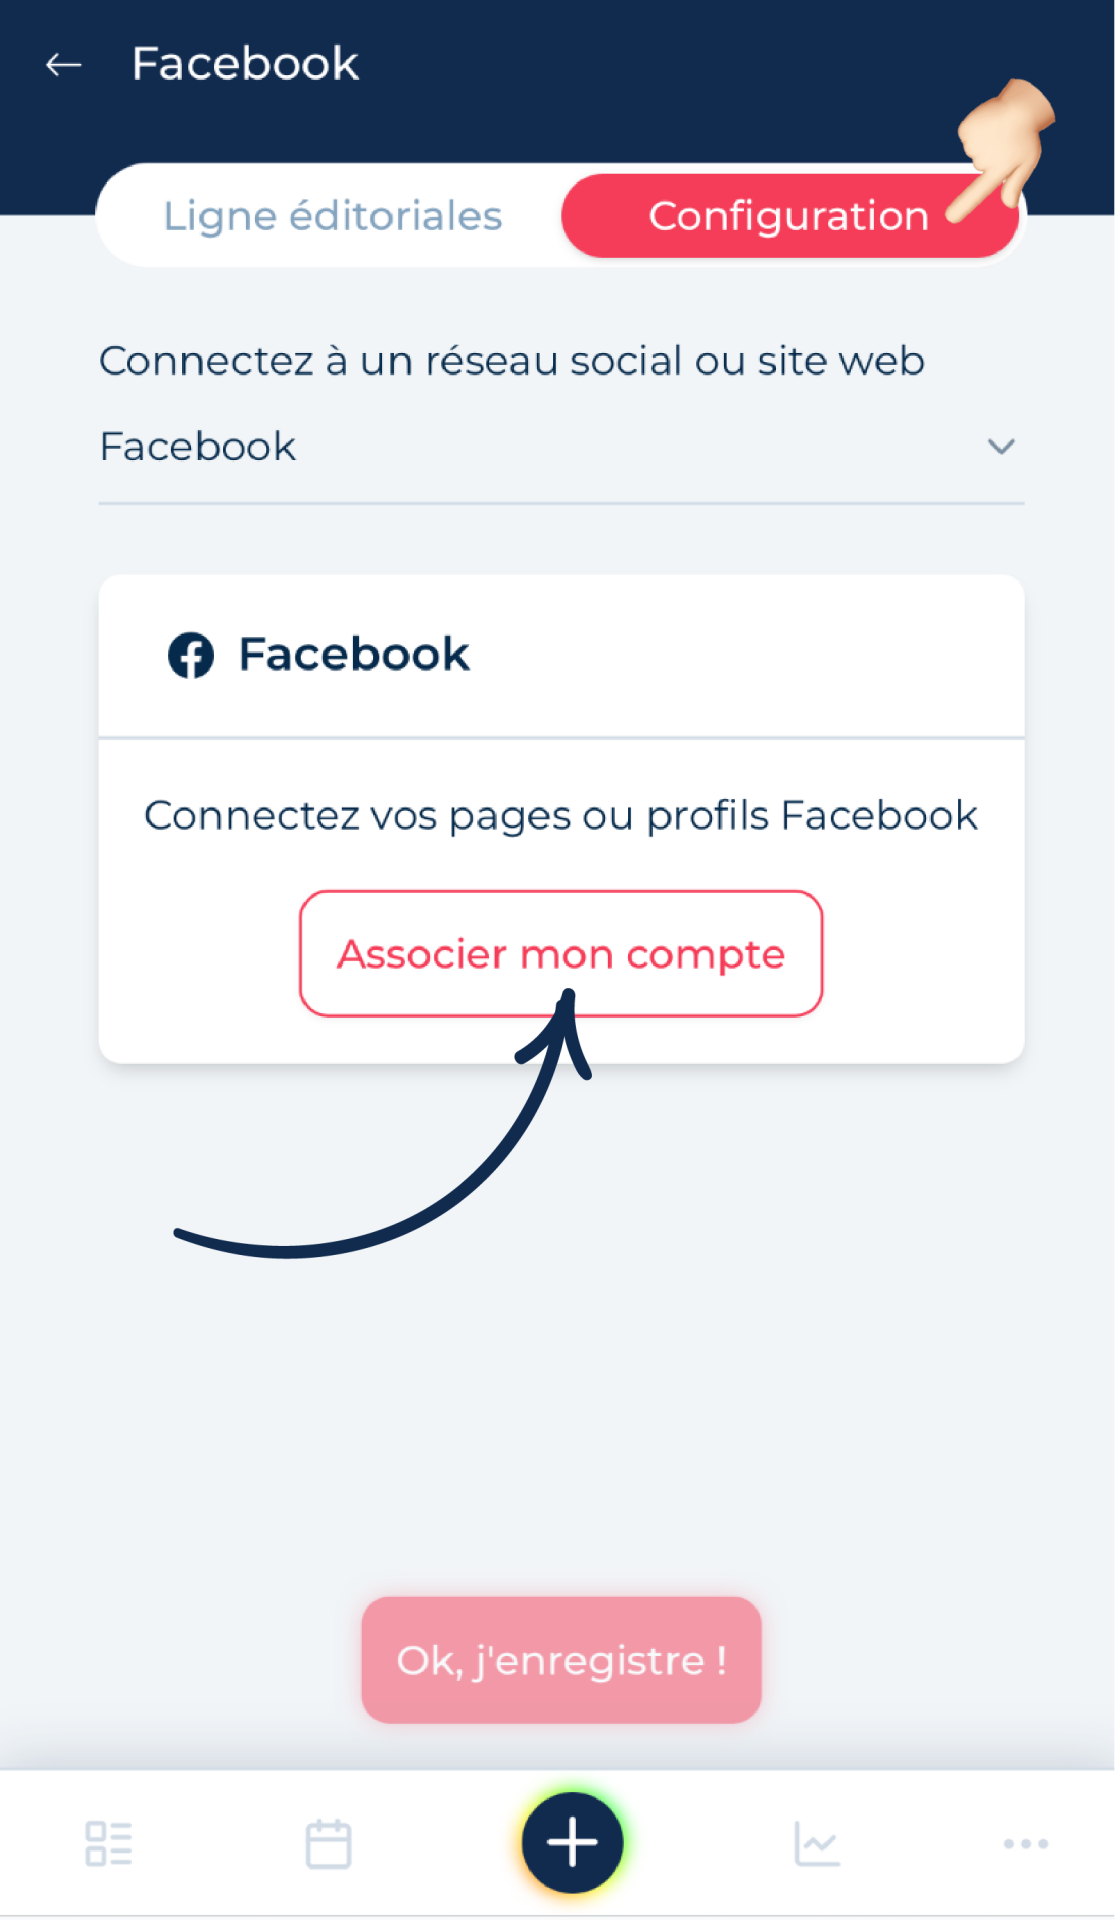
You’ll now be taken to a page dedicated to setting your editorial line for that media. Next to the title in red at the top (indicating the space you’re currently in), you'll see another tab allowing you to configure your account. Tap the “Settings” tab, then tap “Link my account.”
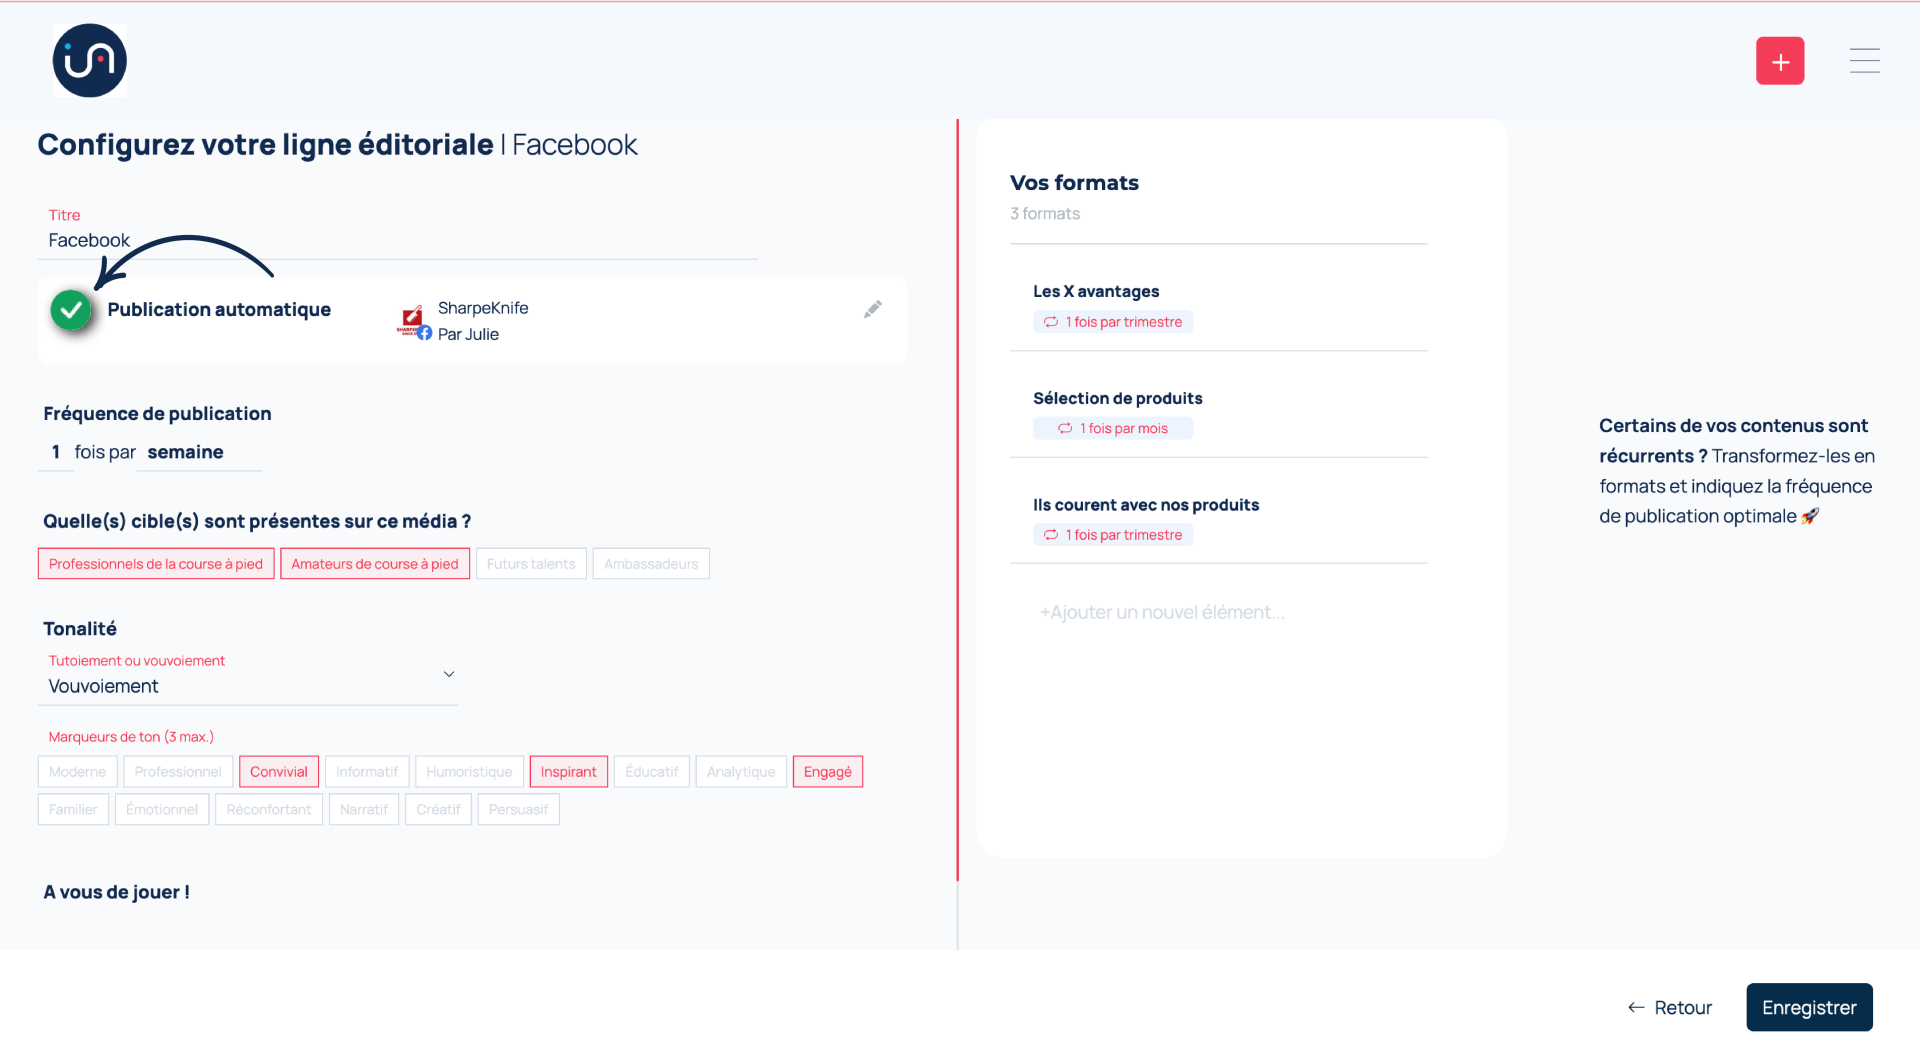
💻 On desktop:
You’ll be directed to the editorial line setup page for that media. Below the title, you'll see a “Automatic Publishing” section with a “Manage My Social Media” button next to it. Click this button and a side panel will slide out from the right, revealing the “Connect My Social Media” section. Click on “Link My Pages.”

Step 5️⃣: Link your pages to the media you've added in ComInTime
📱 On mobile:
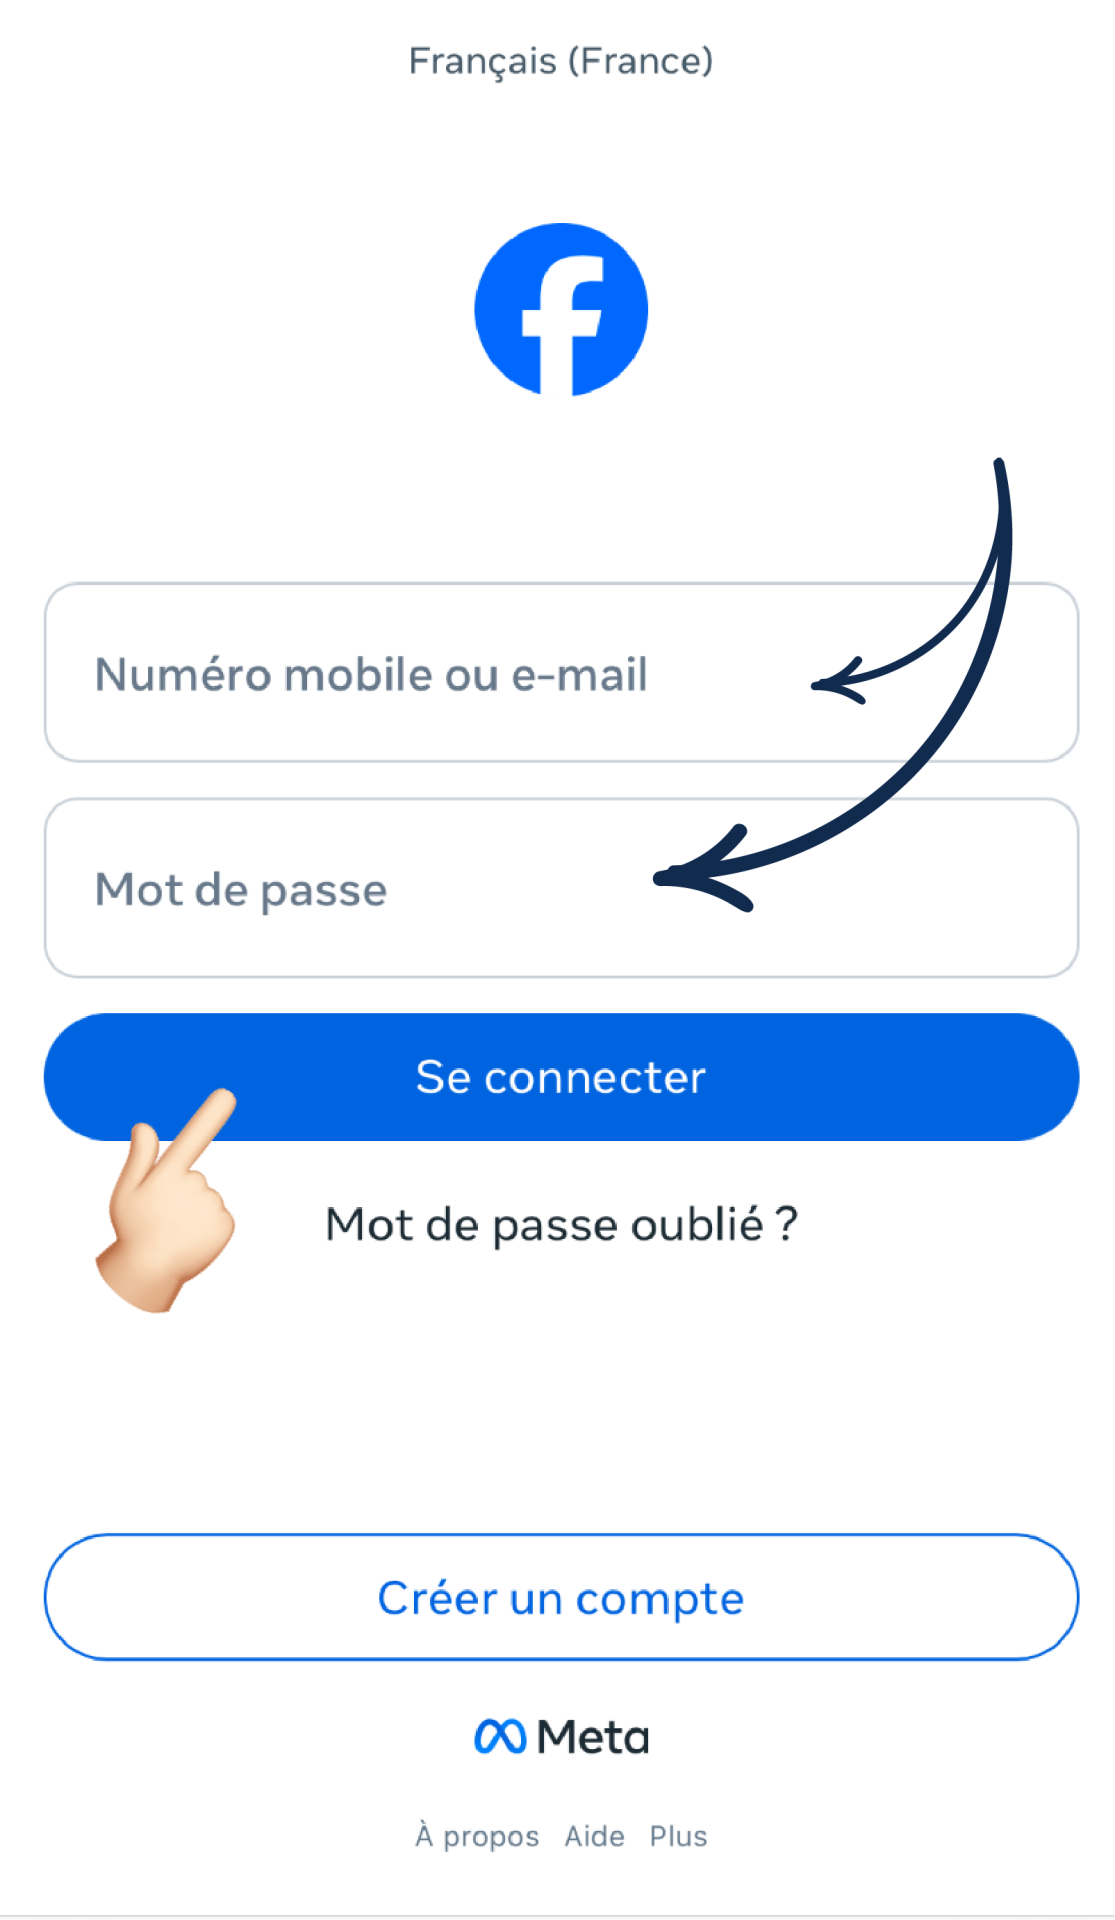
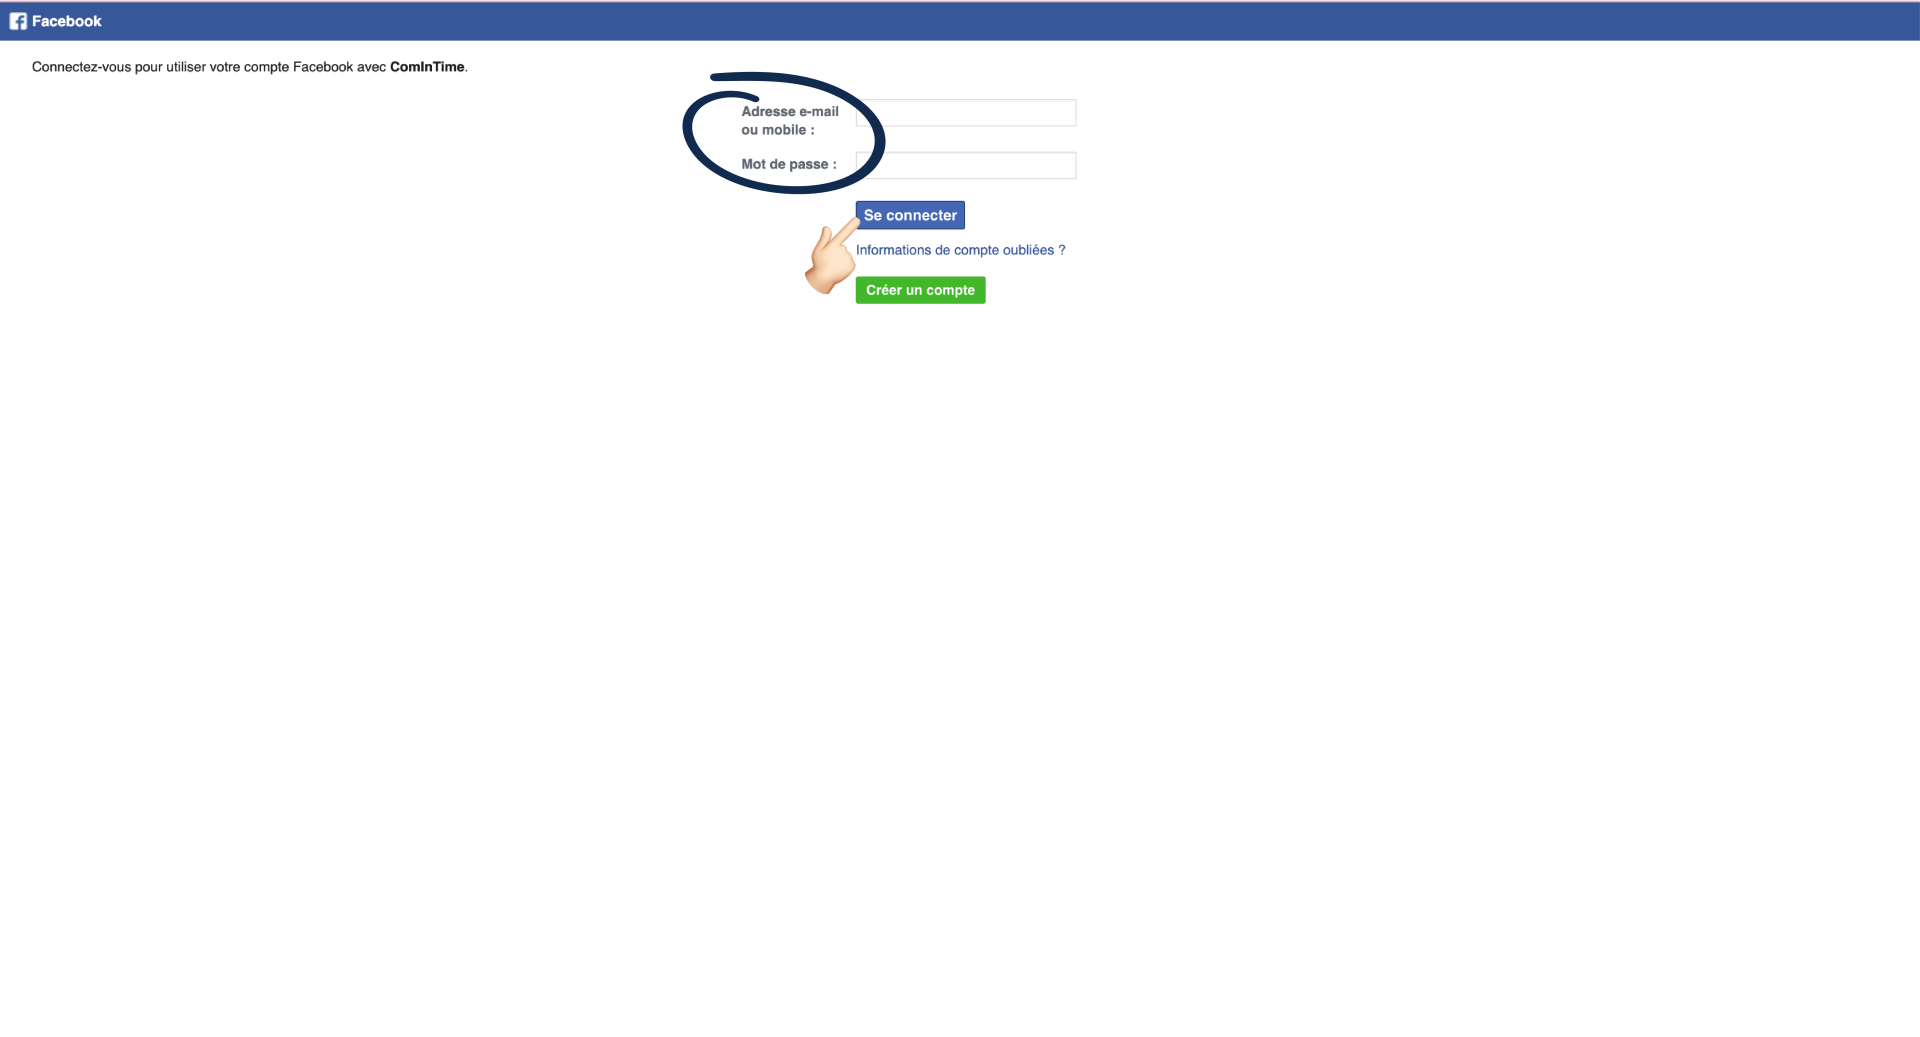
You’ll be redirected to the corresponding social media platform to log in with your credentials. Make sure you're an admin of the pages you want to link to ensure you have the necessary permissions.
💻 On desktop:
You’ll also be redirected to the corresponding social media platform to log in with your credentials. Again, ensure you're an admin of the pages you want to connect.
Step 6️⃣: Check the box next to your account once logged in
📱 On mobile:
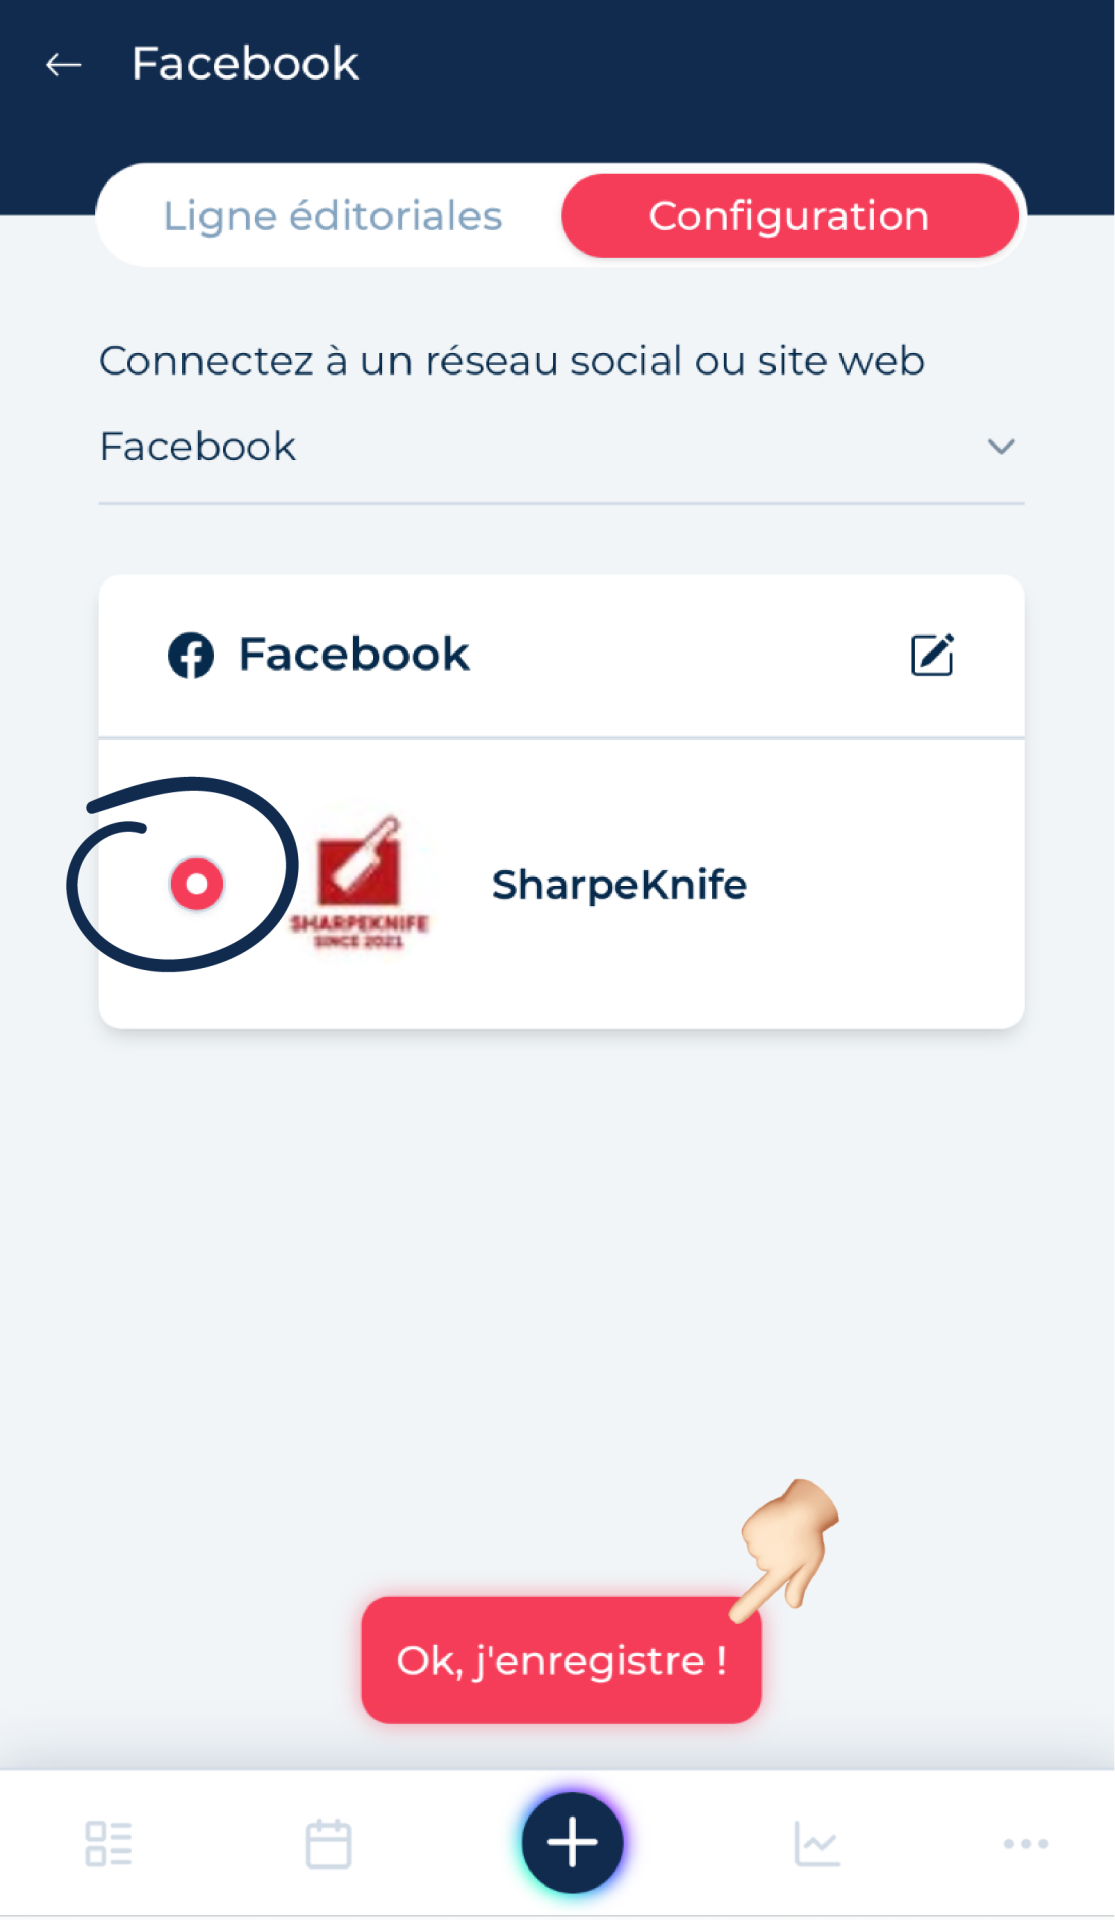
Once you're logged in, you'll be redirected to the media configuration page in ComInTime. Simply tick the round box next to the page or profile that appears to finalize the linking process.
💻 On desktop:
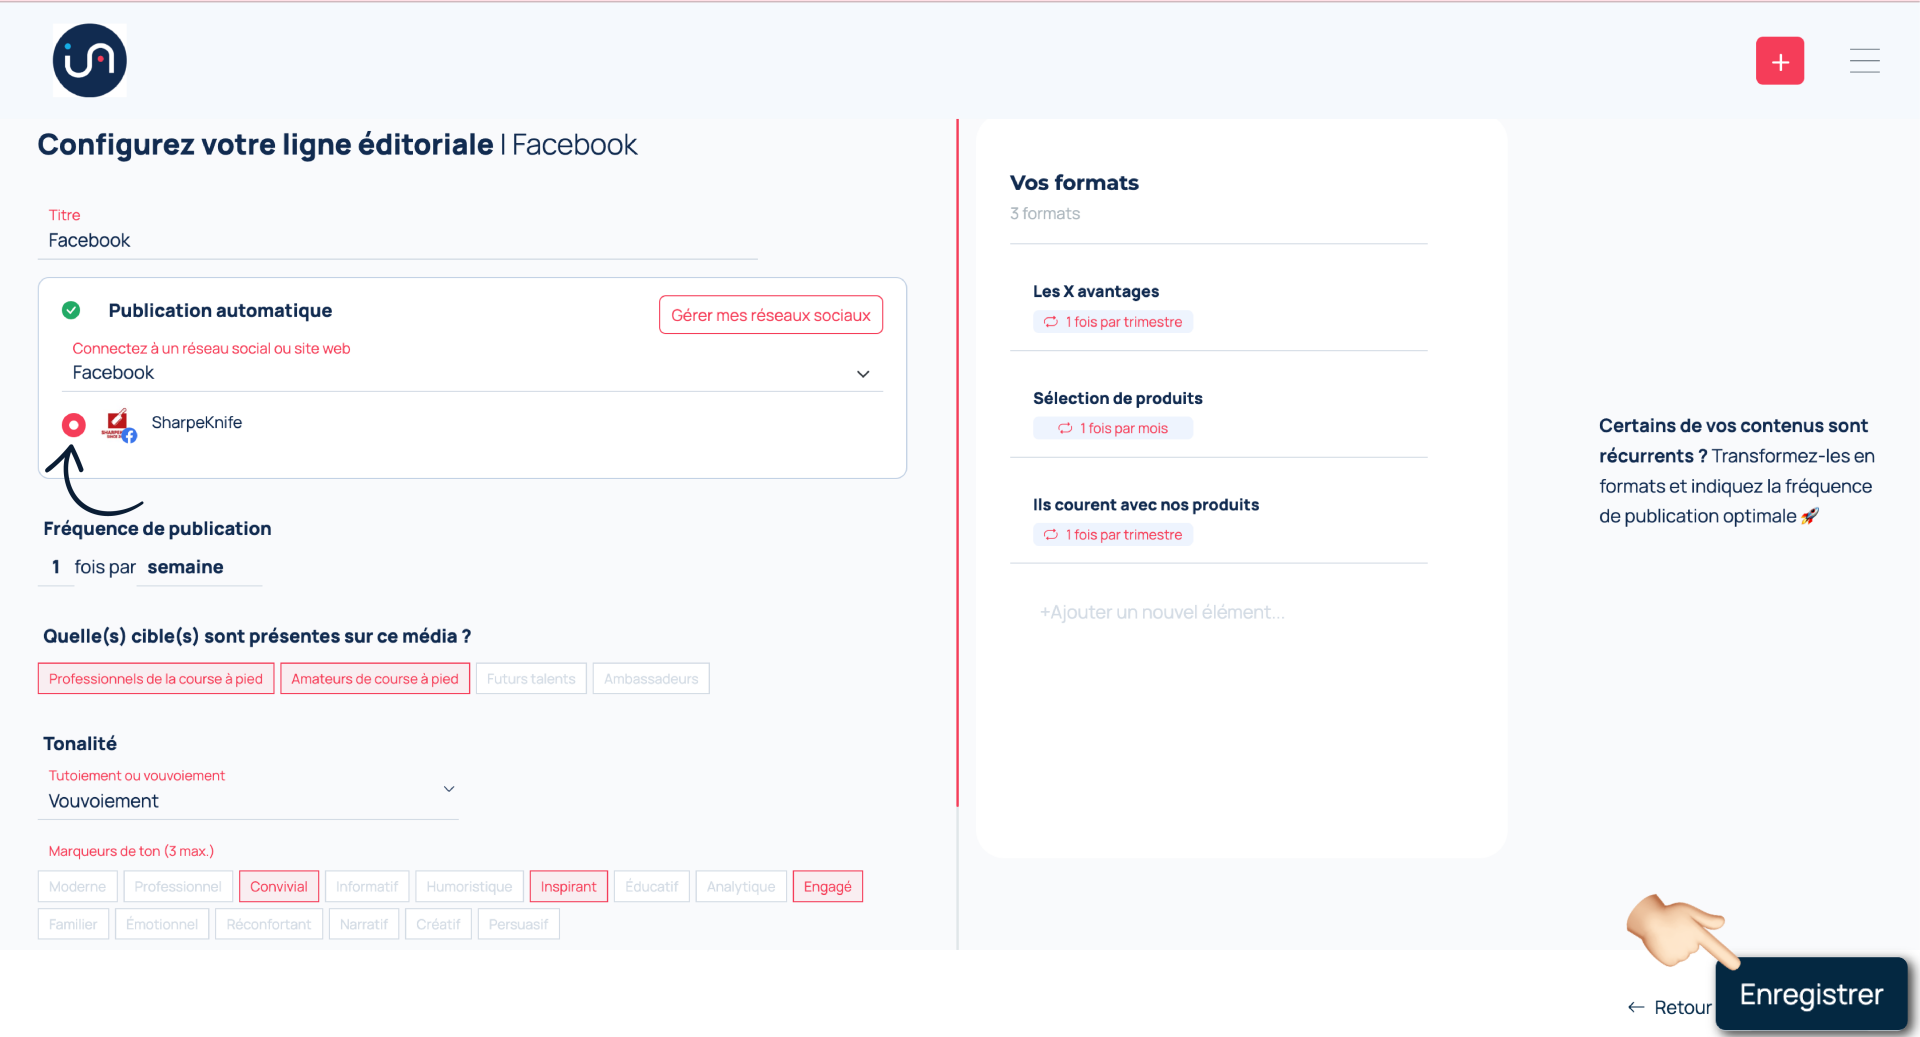
After logging in, return to the media’s editorial line configuration tab in ComInTime. Tick the round box next to the page or profile that now appears, then click “Save” in the bottom-right corner to confirm your changes.
Step 7️⃣: You're ready to schedule your content!
📱 On mobile:
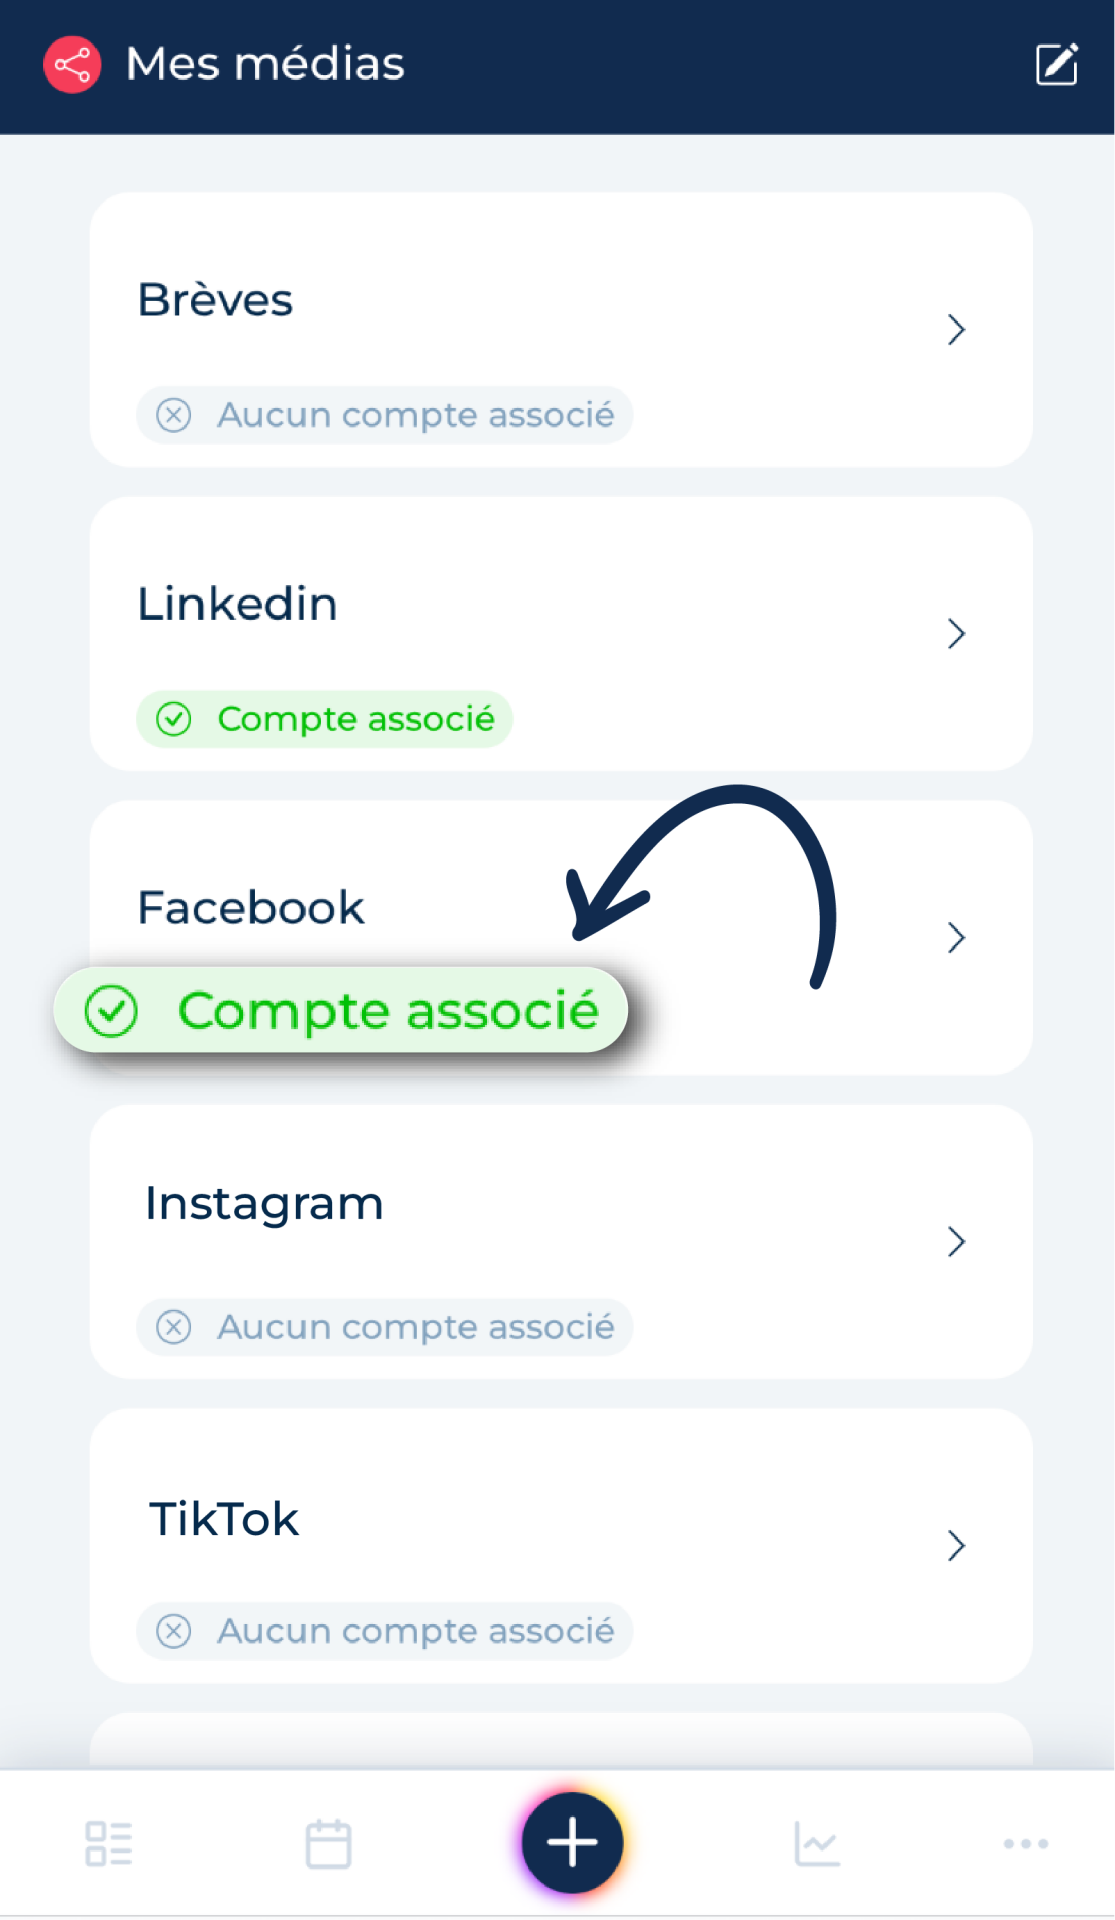
After this step, you’ll return automatically to the Media tab showing your list of channels. Below the one you just linked, a green label saying “Account Linked” will confirm the process was successful.
💻 On desktop:
After saving your choices, your page’s name will appear next to the “Automatic Publishing” label, with a green checkmark confirming that everything was set up correctly.
🎉 And that’s it — your social media accounts are now connected to your ComInTime space!
Even though the mobile version of ComInTime doesn’t yet support direct social media linking, this quick step through the online version (accessible on both desktop and mobile) is simple, fast… and essential to unlocking the full potential of the mobile app from day one.
By completing this setup online, you'll ensure you can:
-
Easily publish content from your phone,
-
Schedule posts independently,
-
And make the most of ComInTime — wherever you are!
Head over to the online version of ComInTime and turn your mobile into a true strategic communications assistant. 🚀